Setting Up Navigation in a React Native App Using React Navigation

Majid Ali Khan
27-06-2024

Majid Ali Khan
27-06-2024
Installing React Navigation
Since I am using React Native CLI instead of Expo, follow these steps to install React Navigation:
First, run this command:
npm install @react-navigation/native
Next, install the required dependencies:
npm install react-native-screens react-native-safe-area-context
Main Navigator
This is the main navigator that will appear at the bottom of the app when it starts.
Step 1: Create the Component
import { createBottomTabNavigator } from '@react-navigation/bottom-tabs';

const Tab = createBottomTabNavigator();

const MainNavigator = () => {
  return (
    // We will add more here soon
  );
};

export default MainNavigator;
Step 2: Configure Header and Bottom Tabs
Header:
const MainNavigator = () => {
  return (
    <Tab.Navigator
      initialRouteName="Home"
      screenOptions={{
        headerShown: true,
        header: () => (
          <View style={styles.header}>
            <Text style={styles.text}>Home</Text>
          </View>
        ),
      }}
    >
      {/* Tabs will go here */}
    </Tab.Navigator>
  );
};

const styles = StyleSheet.create({
  header: {
    height: 100,
    backgroundColor: '#191970',
    justifyContent: 'center',
    borderBottomWidth: 4,
    borderBottomColor: '#FF69B4',
    paddingLeft: 20,
  },
  text: {
    color: '#00FFFF',
    fontSize: 24,
    fontWeight: '200',
    fontFamily: 'archivo',
  },
});
Bottom Tab Styles:
const MainNavigator = () => {
  return (
    <Tab.Navigator
      initialRouteName="Home"
      screenOptions={{
        headerShown: true,
        header: () => (
          <View style={styles.header}>
            <Text style={styles.text}>Home</Text>
          </View>
        ),
        tabBarActiveTintColor: '#00FFFF',
        tabBarInactiveTintColor: 'white',
        tabBarStyle: {
          backgroundColor: '#191970',
          borderTopWidth: 4,
          borderTopColor: '#FF69B4',
          height: 60,
          paddingTop: 8,
          paddingBottom: 8,
        },
      }}
    >
      {/* Tabs will go here */}
    </Tab.Navigator>
  );
};
First Tab Button (Home):
<Tab.Screen
  name="Home"
  component={Home}
  options={{
    tabBarLabel: 'Home',
    tabBarLabelStyle: {
      fontSize: 10,
      fontWeight: 'bold',
    },
    tabBarIcon: () => (
      <Image
        style={styles.icon}
        source={require('../assets/icons/home.png')}
      />
    ),
    headerTransparent: true,
  }}
/>
Second Tab Button (Season):
This button points to the SeasonStackNavigator component because it manages screen transitions within the Season component.
<Tab.Screen
  name="Season"
  component={SeasonStackNavigator}
  options={{
    tabBarLabel: 'Season',
    tabBarLabelStyle: {
      fontSize: 10,
      fontWeight: 'bold',
    },
    tabBarIcon: () => (
      <Image
        style={styles.icon}
        source={require('../assets/icons/season.png')}
      />
    ),
    headerShown: false,
  }}
/>
Now, our main navigator with two buttons is set up. Let's wrap the app in the NavigationContainer as per the docs.
Step 3: Wrap the app in NavigationContainer:
import { NavigationContainer } from '@react-navigation/native';
import MainNavigator from './src/navigation/MainNavigator';

const App = () => {
  return (
    <NavigationContainer>
      <MainNavigator />
    </NavigationContainer>
  );
};

export default App;
If the app shows errors or crashes, check for typos or import issues, or refer to the React Navigation docs for troubleshooting.
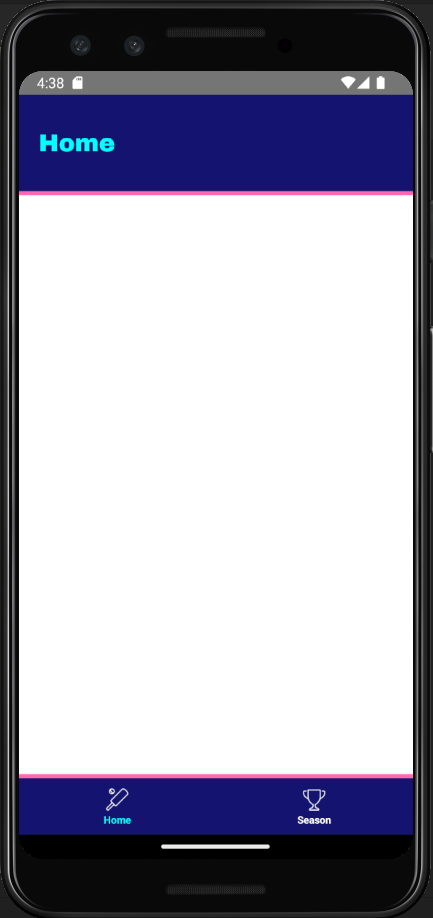
Here is the result of our main navigator: